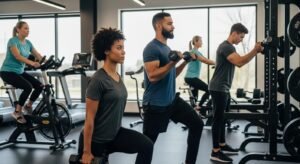
The 3 Exercises You’re Likely Doing Wrong — and How to Protect Your Back While You Train
Low‑back pain from training is common — but most of it is preventable once you can spot the movements that load the lumbar spine the wrong way and swap in safer progressions. This article calls out three high‑risk exercises, explains exactly how bad form stresses discs and soft tissue, and gives gym‑friendly coaching cues you can use immediately. You’ll get clear red flags for when to stop a set, step‑by‑step checks for a neutral spine and a proper hip hinge, and tested alternative lifts that preserve strength without repetitive spinal flexion. Each H2 below breaks down the problem (what goes wrong), the mechanism (how it injures the spine), and practical fixes (regressions, progressions, and programming tips). Read on for the three worst offenders, a short lifting checklist to protect your back, safer alternatives with coaching cues, the biomechanics behind injury, how expert coaching lowers your risk, and the simple principles you should follow every session.
What Are the 3 Worst Exercises for Lower Back Pain?
Lots of everyday gym movements become risky when they repeatedly flex the lumbar spine under load or let the pelvis disconnect from the hips. The three exercises below tend to produce repeated lumbar flexion, excessive shear, or high compression when performed with common faults. Each entry explains the main way it stresses the lower back so you can recognize the pattern in your own training and choose safer options that develop the same capacity without overloading discs. A short table that follows gives the core mechanism at a glance.
These three exercises most often injure the lower back:
- Traditional sit‑ups or heavy weighted crunches: Repeated lumbar flexion that pushes pressure into the discs with every rep.
- Deadlifts performed with a rounded lower back (rounded‑back deadlifts): Spinal flexion under load raises shear and concentrates stress on discs when the lumbar curve collapses.
- Loaded toe‑touches or heavy forward flexion (long‑lever bent‑over movements): End‑range flexion under load produces high compressive forces on the front of the discs.
| Exercise | Primary Risk | Mechanism |
|---|---|---|
| Sit‑ups / Crunches | Repetitive lumbar flexion | Repeated flexion raises disc bulge risk by cyclically loading the anterior annulus |
| Rounded‑back deadlifts | Shear + compression under flexion | Loss of neutral spine produces posterior shear and focal pressure on intervertebral discs |
| Heavy loaded forward flexion / toe‑touches | End‑range compression | Long‑lever forward flexion under load increases intradiscal pressure and strains posterior structures |
That comparison shows which movements create the most harmful patterns for the lumbar spine and why ordinary form faults can turn effective exercises into injury risks. From here we move into a specific look at sit‑ups and deadlifts so you can spot the fault and apply targeted fixes.
How Does Improper Sit‑Up Form Cause Lumbar Spine Strain?
Poor sit‑up mechanics load the lumbar spine by driving repeated flexion while the hip flexors dominate the movement, shifting stress off the hips and onto the discs. When the rectus abdominis pulls with the pelvis free to tilt, the lumbar segments bend cyclically and can develop microtrauma to the annulus fibrosus and posterior disc. Coaching fixes focus on keeping a neutral pelvis, avoiding excessive spinal curl, and swapping in anti‑flexion core work. Regressions such as dead bugs and knee planks build segmental control while cutting disc loading, and progressions toward loaded anti‑extension drills restore capacity without repeating harmful flexion.
Why Can Deadlifts with Poor Form Lead to Herniated Discs?

Deadlifts turn risky when the lifter rounds the lower back, lets the hips and torso rise unevenly, or allows the bar to drift away from the body — all of which increase shear and anterior disc compression. Look for a collapsing lumbar curve, hips shooting up before the chest, or the bar moving forward of mid‑foot. Corrective coaching emphasizes a strict hip hinge, keeping the load close, bracing with a diaphragmatic breath, and rehearsing Romanian deadlift patterns with light weight. Build the pattern with bodyweight hinges, kettlebell deadlifts, then gradual barbell loading to restore a safe hinge before you add heavy weight.
If these descriptions ring true for your sets, consider a focused movement assessment to find the motor‑control or mobility deficits that let those faults appear.
How Can You Protect Your Back When Lifting Weights?
Protecting your back while lifting comes down to holding a neutral spine, bracing reliably, mastering the hip hinge, and progressing loads conservatively. Neutrality reduces shear across lumbar segments and routes force through hips and legs; solid bracing raises intra‑abdominal pressure to stabilize the trunk during heavy reps. Simple checks — video a set, use mirror alignment cues, or run a slow practice rep — help you hold form as intensity rises. Smart load management and programmed progression prevent fatigue‑driven breakdowns so technique stays first priority.
Follow this step‑by‑step checklist to protect your back when lifting weights:
- Find and hold a neutral spine before every rep: Use chest‑up and rib‑neutral cues to keep a safe lumbar curve.
- Brace your core with a diaphragmatic inhale and firm abdominal tension: Build steady intra‑abdominal pressure before you move the load.
- Use a true hip hinge — move the hips, not the lower back: Push hips back with soft knees and keep the weight close to the body.
- Increase load gradually and stop when technique breaks down: Lower the weight rather than sacrificing position.
These steps are the foundation of safe training and set you up for the specific drills that teach the hinge and reliable bracing patterns described next.
What Is the Importance of Maintaining a Neutral Spine?
Neutral spine is the body’s natural S‑shaped alignment across the lumbar and thoracic regions that balances compressive and shear forces during movement. Holding neutral protects discs from abnormal loading. Finding neutral usually means a slight lumbar lordosis, active but relaxed glutes, and ribs that aren’t flared up — the cue “chest up, ribs neutral” helps most people. Prioritize good position over excessive range: less motion with solid alignment beats more motion with collapse. Practical checks include filming lifts, using tactile feedback (a dowel against the back), and slow rehearsal reps to build motor patterns that preserve the spine under load.
How Does Engaging Your Core Support Spinal Stability?
Bracing the core stabilizes the spine by increasing intra‑abdominal pressure and forming a rigid cylinder that resists bending and rotation under load. Bracing isn’t “sucking in”; it’s a full diaphragmatic breath followed by firm outward abdominal tension held through the lift. Train the pattern with breathing‑and‑brace drills, suitcase carries, and unloaded anti‑extension holds before you add heavy weight. Dependable bracing lets the legs and hips transfer force safely while protecting the lumbar segments. Don’t rush progressive overload — master the brace first so fatigue doesn’t erode your protection.
What Are Safe and Effective Alternatives to Harmful Back Exercises?

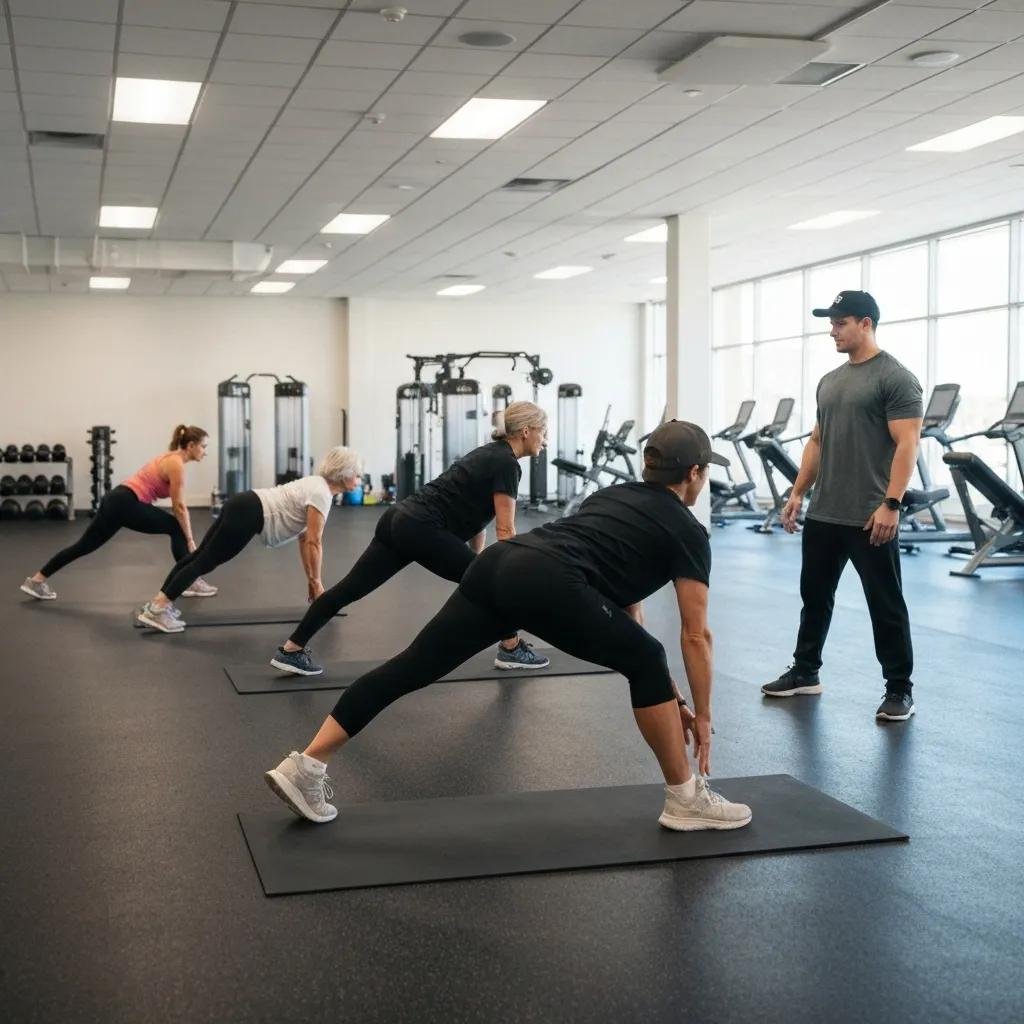
Swapping risky moves for back‑friendly alternatives lets you build strength and function while cutting disc stress and repetitive flexion. Good substitutes focus on anti‑flexion and hip‑driven power: planks and bird‑dogs build core stiffness and segmental control, bridges and hinge progressions load the posterior chain without repeated lumbar curl, and kettlebell deadlifts teach a short‑lever hinge. These exercises transfer directly to heavier lifts and can be progressed safely for beginners and older adults. The table below matches alternatives to primary muscles, simple safety cues, and easy progression steps you can use in your weekly plan.
The alternatives below are practical, gym‑friendly choices that reduce lumbar risk while preserving strength gains.
| Substitute Exercise | Muscles Targeted | Safety Cues | Progression |
|---|---|---|---|
| Plank variations | Rectus abdominis, obliques, transverse abdominis | Keep a neutral spine, squeeze glutes, steady breath | Knee plank → full forearm plank → weighted plank |
| Bird‑dog | Erector spinae, glutes, multifidus | Slow contralateral reach with a neutral pelvis — no rotation | 8–12 sec holds → add light ankle hold → add limb weight |
| Glute bridge / hip thrust | Gluteus maximus, hamstrings | Drive through the heels, avoid hyperextending the lumbar spine | Double‑leg bridge → single‑leg bridge → banded or loaded thrust |
| Kettlebell deadlift (strict hinge) | Hamstrings, glutes, lats | Hinge at the hips, keep torso long and weight close | Hip‑hinge drill → kettlebell hinge → heavier kettlebell |
Use this quick comparison to pick alternatives that fit your goals while prioritizing spinal safety. Each option can be measured and progressed across weeks for steady, reliable improvement.
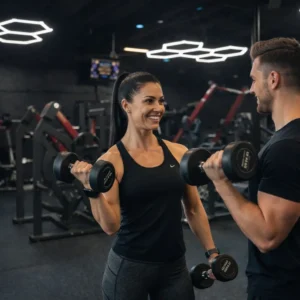
How we help: Results Transformation Center (RTC) recommends building these alternatives into personalized strength plans delivered by expert coaches. A supervised progression teaches the hip hinge, safe bracing, and incremental load increases while a coach monitors fatigue and movement quality. RTC pairs movement assessments with progress tracking so coaches can identify weak links — poor glute activation or thoracic stiffness, for example — and tailor regressions and progressions. Programs like 14‑Day Kickstart, Elevate 28, and the 6‑Week Challenge offer structured, coach‑led ways to build capacity safely.
At Results Transformation Center, you’ll find a welcoming community of people balancing careers, family, and the pursuit of better health. Join us and take practical steps to feel and move better every day.
Why our members love us:
- Classes designed specifically for adults 50+
- A supportive, judgment‑free environment
- Flexible scheduling for busy lives
Unlock your FREE 3‑Day VIP Pass during your first month or visit us at resultstc.com
Call us now at (916) 371-2496 to get started on a stronger, healthier you. Don’t miss this opportunity!
How Do Planks Improve Core Strength and Protect Your Back?
Planks develop anti‑extension stiffness — resisting the body’s urge to arch — and stabilize the spine without repeated flexion. A correct plank keeps a neutral line from head to heels, glutes engaged, and breathing controlled; common faults are sagging hips or an extended neck. Progress by extending hold times and adding variations: knee plank → forearm plank → weighted or unilateral plank. Program planks two to three times per week with gradual increases to build fatigue‑resistant stability that carries into lifts and daily activities.
Why Is the Bird‑Dog Exercise Recommended for Spinal Stability?
Bird‑dog trains contralateral coordination of the trunk and hips, promoting segmental stabilization that limits harmful lumbar motion during loaded lifts. Move slowly with a neutral pelvis, reach the opposite arm and leg without rotation or pelvic tilt, and prioritize control over range. Start with short holds for 8–10 reps per side, progress to longer holds, and add light limb resistance when you’re ready. Regular bird‑dog work improves motor control, reduces compensatory lumbar movement, and prepares the body for safer force transfer through the hips.
How Does Improper Exercise Form Cause Back Pain and Injury?
Poor form creates back pain through predictable biomechanical pathways: repeated lumbar flexion causes disc microtrauma, end‑range flexion raises anterior disc compression, and uncontrolled rotation or shear strains ligaments and facets. Fatigue and limited mobility make these problems worse by degrading technique and shifting load onto passive tissues instead of muscle chains. Identifying whether the root issue is mobility, motor control, or strength guides the right corrective strategy — mobility work, targeted activation drills, or progressive loading — and interrupts the injury cascade. The troubleshooting guidance below helps you spot primary form errors and choose the right fix.
What Common Form Mistakes Increase Risk of Lumbar Strain?
Common mistakes that raise lumbar strain risk are straightforward: collapsing the lumbar curve during lifts, initiating movement with the spine instead of the hips, and allowing rotation under load. These faults show up on video or in coach cues — a dropping chest, bar drifting forward, or knees locking early on a pull. Immediate corrections include slowing tempo, unloading to a technical set, and drilling the hip hinge with tactile or dowel feedback. Short corrective drills — banded glute bridges, slow eccentric deadlifts, and 3–5 controlled hinge reps before heavy sets — address the mobility and control issues behind those visible mistakes.
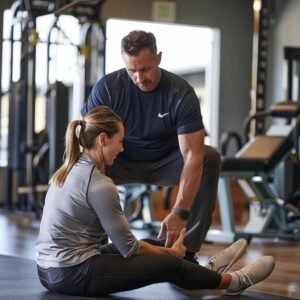
How Can Personalized Movement Assessments Prevent Back Injuries?
Personalized movement assessments test mobility, strength, and motor control to uncover the specific deficits that drive form breakdown and back pain. A typical screen checks hip and thoracic range, evaluates glute and core activation, and uses task‑based observation to reveal compensation under load; findings then drive corrective programming. If an assessment shows poor glute activation, coaches prescribe targeted accessory work and progression steps that eliminate lumbar compensation and re‑route force through the hips. Regular re‑testing tracks improvement and lets coaches safely advance load while keeping technique intact, lowering the risk of new or recurring injuries.
How Can Expert Coaching Help You Avoid Back Injury Forever?
Expert coaching lowers injury risk by diagnosing individual movement faults, building targeted strength programs, and supervising progressive loading until safer patterns become automatic. A coach sees subtle breakdowns you can’t feel in the moment, prescribes the right regressions and progressions, and times load increases to prevent fatigue‑driven technique collapse. Results Transformation Center (RTC) combines science‑backed movement assessments, personalized training, expert coaching, and tracking so coaches can map deficits to corrective steps and create a clear path from assessment to durable performance. For many clients, structured programs and coach‑led sessions provide the consistent feedback loop needed to permanently replace bad movement habits.
| Service | Assessment Focus | Expected Outcome |
|---|---|---|
| Movement assessment | Mobility, motor control, activation patterns | Identify movement faults and prescribe corrective drills |
| Personalized strength training | Targeted muscle development and progressive overload | Offload lumbar stress by strengthening hips and core |
| Expert coaching & progress tracking | Technique monitoring and load management | Safer lifts, steady progression, fewer recurring injuries |
What Role Does Personalized Strength Training Play in Back Health?
Personalized strength training targets weak links — glutes, hip extensors, and core stabilizers — that otherwise force the lumbar spine to compensate. A program that prioritizes the posterior chain, unilateral control, and anti‑extension core work shifts load off the lumbar segments while improving performance. Coaches sequence movements so clients master hinge mechanics and bracing before increasing load, and they adapt prescriptions for older clients or those returning from pain. Over weeks, these focused strength gains reduce reliance on spinal structures and create a more durable foundation for heavier compound lifts.
How Do Science‑Backed Movement Assessments Identify Exercise Risks?
Science‑backed assessments use systematic screens and tests — mobility measures, activation checks, and task‑based observation — to pinpoint risky patterns and quantify deficits. The workflow usually follows screen → targeted test → corrective intervention → re‑test, giving objective markers for safe progression. Examples include glute‑bridge activation checks to spot posterior‑chain inhibition and thoracic rotation screens to reveal mobility limits that force lumbar compensation. Ongoing reassessment lets coaches refine programming and confirm that corrective drills translate into safer technical performance under increasing load.
What Are the Key Principles of Back‑Safe Exercise You Should Know?
Back‑safe training centers on a few consistent principles: protect neutral spine, master the hip hinge, build dependable bracing, manage progressive overload, and address mobility when needed. These rules apply to everyone — beginners, older adults, and athletes — because they control the mechanical environment of the lumbar spine and make sure force travels through strong muscle systems instead of vulnerable passive tissue. Program cycles should mix anti‑flexion core work, posterior chain strengthening, mobility sessions, and technical rehearsal with measured intensity increases. Keeping these principles front‑and‑center makes training sustainable and dramatically lowers cumulative injury risk.
Below are core principles to apply in every session, with a brief reason for each.
- Maintain neutral spine and alignment: Keeps load distribution balanced and minimizes shear.
- Prioritize the hip hinge for posterior loading: Moves stress from spinal segments to the hips and glutes.
- Train reliable bracing and breathing: Stabilizes the torso and protects the spine under load.
- Progress load conservatively and monitor fatigue: Prevents technique collapse from overreaching.
- Address mobility deficits early: Restores safe movement range and avoids compensatory lumbar motion.
How Does Mastering the Hip Hinge Protect Your Spine?
Mastering the hip hinge shifts the primary movement and load to the hips and glutes, cutting rotational and bending stress on the lumbar vertebrae. A correct hinge uses a soft knee, pushed‑back hips, and a neutral spine while maintaining posterior chain tension. Common progressions include kettlebell deadlifts, Romanian deadlifts, and finally barbell deadlifts. Simple drills — dowel hip‑hinge practice, band‑resisted hinges, and tempo Romanian reps — build the motor pattern without heavy compression. When the hinge is dependable, everyday lifting and heavy training become less risky because the hips do the work, not the lumbar spine.
Why Is Core Engagement Essential for Preventing Back Pain?
Core engagement raises trunk stiffness and redirects forces away from passive spinal tissues, lowering injury risk during lifting and dynamic activity. Bracing trains the body to produce and keep intra‑abdominal pressure so the lumbar spine resists unwanted motion as load or perturbation increases. Exercises that build dependable engagement — planks, loaded carries, and anti‑extension progressions — should be integrated into strength cycles, not tacked on as an afterthought. Regular core work makes bracing automatic and reduces cumulative stress on discs and ligaments over months of training.
If you’re ready to make a change, a coach‑led movement assessment and a personalized program are the fastest routes to safer lifting and steady progress. Book a Free VIP Experience with Results Transformation Center to have our coaches evaluate your movement, build a tailored plan, and supervise your progress so you can lift stronger with less injury risk.
Frequently Asked Questions
What are the signs that I might be using improper form during exercises?
Watch for persistent discomfort or pain during or after workouts, trouble holding balance, or obvious posture changes like a rounded back or exaggerated arch. Relying on momentum instead of controlled movement is another red flag. Record a set or ask a coach for feedback — objective observation helps you spot issues you can’t feel in the moment. Regular self‑checks and awareness of your mechanics go a long way toward preventing injury.
How often should I reassess my exercise form to prevent back injuries?
Reassess every few weeks, especially when you add weight or introduce new movements. Frequent checks catch emerging faults before they become habits. Also reassess after major routine changes or any episode of pain. Periodic coach evaluations provide valuable perspective and ensure your technique remains safe as you progress.
Can I still perform high‑intensity workouts if I have a history of back pain?
Yes — with thoughtful modifications. Focus on low‑impact variants, maintain a neutral spine, and choose movements that protect your back. Prioritize core stability and mobility work, and consult a coach or physical therapist for individualized adjustments. With the right progressions and monitoring, high‑intensity training can be safe and effective.
What role does flexibility play in preventing back injuries during exercise?
Flexibility helps preserve joint and muscle range, which supports good form. Tight hips or hamstrings often force compensatory lumbar motion and increase strain. Regular mobility work reduces that risk — use dynamic warm‑ups before training and targeted stretching or mobility sessions afterward to keep movement quality high.
Are there specific warm‑up exercises that can help protect my back before lifting?
Absolutely. Start with dynamic movements that wake up the hips, hamstrings, and core: leg swings, hip circles, and torso rotations. Add activation drills like glute bridges and bird‑dogs to prime the posterior chain and core. A warm‑up should raise heart rate and prepare mobility so your body is ready for the training load.
How can I tell if an exercise is safe for my back?
Assess whether you can maintain a neutral spine, brace your core, and move without pain. Consider the mechanics: exercises that force repeated lumbar flexion or create high shear should be modified. When in doubt, ask a trained coach to review your form and suggest safer alternatives or regressions.
What should I do if I experience back pain during or after exercising?
Stop the activity and reassess — rest, use ice if it helps, and avoid movements that make it worse. If pain persists beyond a few days or is severe, see a healthcare professional for evaluation. Early intervention and sensible modifications prevent small issues from becoming long‑term problems.
Conclusion
Understanding how poor form causes lower back injury is the first step to safer, more productive training. By spotting high‑risk movements and using smart alternatives and progressions, you can keep building strength while protecting your spine. If you want a fast, reliable path forward, schedule a movement assessment to find your weak links and get a personalized plan. Take the next step — lift smarter, move better, and reduce injury risk for good.
At Results Transformation Center, you’ll discover a supportive community of individuals balancing careers, family, and the quest for improved health. Join us and take actionable steps to feel and move better every day.
Why our members love us:
✅ Classes designed for any age.
✅ A supportive, judgment‑free environment
✅ Flexible scheduling for busy lives
Unlock your FREE 3‑Day VIP Pass during your first month or visit us at https://resultstc.com/
Call us now at (916) 371-2496 to get started on a stronger, healthier you. Don’t miss this opportunity!